

Last Updated on 2026-03-01 by Tsubaki
Although I’ve lived in Japan for over 8 years and have climbed many mountains big and small, hiking Yakedake surprisingly became my second peak among Japan’s 100 Famous Mountains, right after Mt. Fuji. Taking advantage of the short window before Kamikochi’s winter closure in early November, I set out on a Yakedake hike, with a side trip to Kamikochi for sightseeing.
In this article, I’ll walk you through how to get to Yakedake, the available hiking routes, and share important tips and insights. I hope this serves as a helpful reference for anyone aiming to conquer Japan’s 100 Famous Mountains!
About Yakedake – One of Japan’s 100 Famous Mountains

Yakedake (焼岳) is one of Japan’s “Hyakumeizan” (百名山|100 Famous Mountains) and notably the only active volcano in the Northern Japanese Alps. Straddling the border between Gifu and Nagano prefectures, Yakedake rises to about 2,455 meters. While it’s not the tallest in the region, its dramatic volcanic terrain and breathtaking views have made it a favorite among hikers.
The name “Yakedake” literally means “Burning Mountain,” a nod to its volcanic nature. You can still see steam rising from volcanic vents near the summit, a vivid reminder of the mountain’s ongoing activity.
Highlights of the hike include:
・The steaming crater at the North Peak
・The vividly blue Shōga-ike Pond
・Panoramic views of the Hotaka mountain range in Kamikochi
Best Time to Hike Yakedake
The ideal season for hiking Yakedake is generally from June through November, before the winter snow sets in. The autumn foliage in particular is said to be spectacular.
However, because Yakedake is an active volcano, there are certain risks involved. Before your hike, always check the latest volcanic activity alerts (via the Japan Meteorological Agency) and weather forecasts for the Kamikochi area (via tenki.jp ). You’ll also find volcano warning signs posted at bus stops and trailheads, make sure to pay attention to these.
Another great perk of the area: the region is rich in natural hot springs. A post-hike soak is the perfect way to end your trek, making Yakedake a top choice for mountain lovers seeking both challenge and relaxation.
Yakedake Hiking Routes
There are two main hiking routes to the summit of Yakedake’s North Peak:
・The Kamikochi Route (上高地ルート)
・The Nakanoyu Route (中の湯ルート)
Both trails lead to the North Peak and offer magnificent views of the volcanic terrain and lush forests. On clear days, you can see as far as the Hotaka Mountain Range and even Mt. Yari.
There is also a lesser-used third route via Nakao Onsen(中尾温泉ルート), but in this article, I’ll focus on the more popular and accessible Kamikochi and Nakanoyu routes.
Kamikochi Route

Kamikochi → Tashirobashi Bridge → Trailhead → Yakedake Hut → Yakedake (North Peak) → Yakedake Hut → Trailhead → Kamikochi
・Ascent time: approx. 4 hours
・Descent time: approx. 3 hours
(Based on official data)
The Kamikochi route is the most popular trail to Yakedake. It starts from Kappa Bridge in Kamikochi, Nagano Prefecture. Since the trailhead begins at a relatively high elevation, it’s ideal for hikers with beginner-to-intermediate experience in mountain trekking.
Nakanoyu Route

New Nakanoyu Trailhead → Hiroba → Yakedake North Peak → Hiroba → Original Nakanoyu Trailhead
・Ascent time: approx. 3 hours
・Descent time: approx. 2.5 hours
(Based on my actual hiking time)
The Nakanoyu route is another popular choice among beginner and intermediate hikers. It starts from the Gifu Prefecture side, at the Nakanoyu trailhead. This trail features a more gradual elevation gain, but it’s slightly longer, with a round trip taking about 6 to 7 hours, so a decent level of stamina is still required.
💡 Pro Tip: The nearest bus stop to the Nakanoyu trailhead is about an hour’s walk, so many people who start from this trailhead choose to drive. If you’re not driving, it’s more convenient to use public transport to Kamikochi and start the hike from there instead.
Kamikochi to Nakanoyu Traverse

New Nakanoyu Trailhead → Hiroba → Yakedake → Yakedake Hut → Trailhead → Kappa Bridge
・Ascent time: approx. 3 hours
・Descent time: approx. 3 hours
One of the classic hiking options is to hike across Yakedake, starting from Kamikochi and descending via the Nakanoyu route.
You can also go the opposite direction, hiking from Nakanoyu to Kamikochi and enjoying some sightseeing at the end of your hike. However, keep in mind that the last shuttle bus from Kamikochi usually departs around 17:00, so be sure to time your hike accordingly!
⚠️ Important Note: The connecting trail between the Yakedake summit and Yakedake Hut (which links the Kamikochi and Nakanoyu routes) is closed in winter from October to May. If visiting in colder months, you’ll need to choose one route for both ascent and descent.
Tips & Precautions for Hiking Yakedake

Although Yakedake is one of the more accessible mountains among Japan’s 100 Famous Peaks, once you start the hike, restrooms are virtually non-existent.
On the Kamikochi side, you can still use the tourist center’s restrooms, but the Nakanoyu trailhead has no toilet facilities at all. If you’re not comfortable with relieving yourself in the woods, I highly recommend bringing a portable toilet bag designed for hiking.
Another thing to note: the steps on Yakedake can be very steep and uneven. If you’re on the shorter side like me, or have shorter legs, going up and especially coming down can be quite tough. A trekking pole is highly recommended to avoid knee strain.
Suggested items:
・Portable toilet bags
・Lightweight trekking poles
How to Get to the Yakedake Trailheads
Yakedake trailheads transportation

Since Yakedake is located in a less accessible area of Nagano, getting there typically requires a combination of shinkansen, local trains, buses, or driving.
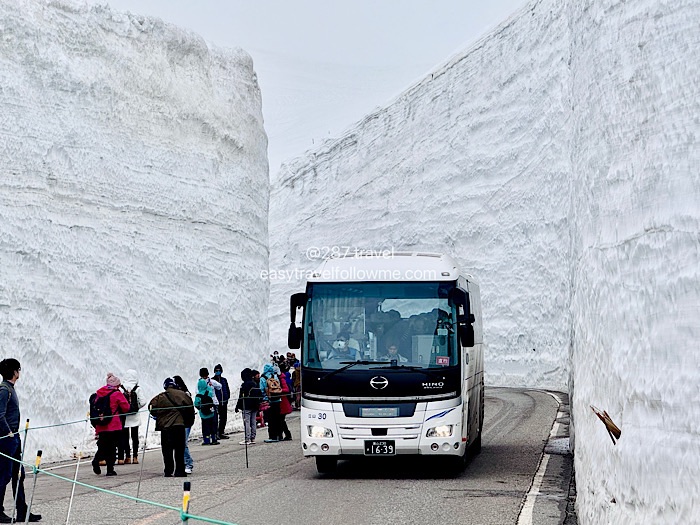
Keep in mind which route you plan to hike, as it determines your access point. Private vehicles are prohibited on the road leading directly into Kamikochi in order to preserve the natural environment, so you’ll need to use designated shuttle buses or taxis to reach the Kamikochi trailhead.
Restricted Access Road to Kamikochi
If you plan to drive and start your Yakedake hiking via the Kamikochi route, be aware that part of the road leading to Kamikochi is closed to private vehicles.

For details on Kamikochi’s no-entry zones and how to navigate the shuttle system, refer to my previous article.
Self-driving to Kamikochi from Tokyo | Essential Travel Info & Shuttle Parking
It outlines how to drive close to Kamikochi and transfer to a shuttle bus. I won’t go into the full details again here.
On the other hand, if you choose to start your hike from the Nakanoyu route, you won’t be affected by any vehicle restrictions, you can drive directly to the trailhead.
How to Get to the Trailheads – Summary
Here’s a quick summary of how to reach both trailheads:
Kamikochi Route
1. Direct buses to Kamikochi (advance reservation recommended)
2. Drive → Park at Sawando or Hirayu (Akandana) → Shuttle bus to Kamikochi Bus Terminal
3. From Shinjuku/Nagoya → Matsumoto → Shin-Shimashima → Kamikochi Bus Terminal
4. From Shinjuku/Nagoya → Matsumoto → Kamikochi Bus Terminal
5. From Shinjuku → Nagano → Kamikochi Bus Terminal
6. From Nagoya → Takayama → Hirayu → Kamikochi Bus Terminal
Nakanoyu Route
1. Driving (most recommended option)
2. From Shinjuku/Nagoya → Matsumoto → Shin-Shimashima → Nakanoyu Bus Stop
3. From Shinjuku/Nagoya → Matsumoto → Nakanoyu Bus Stop
4. From Shinjuku → Nagano → Nakanoyu Bus Stop
5. From Nagoya → Takayama → Hirayu → Nakanoyu Bus Stop
Why We Chose the Nakanoyu Trailhead
In November, I planned a Yakedake hiking just before Kamikochi’s seasonal closure. Since we were driving, and the connecting trail between Kamikochi and Nakanoyu was closed for winter, we decided to start from the Nakanoyu trailhead and do a round-trip hike, ascending and descending via the same route.
✔️ New Nakanoyu Trailhead
Address: Kamikochi Azumi, Matsumoto, Nagano 390-1520(Google Maps)
Access: Best reached by car
Public transport: Bus to Nakanoyu Bus Stop, followed by 1-hour walk
Parking at New Nakanoyu Trailhead

Right in front of the trailhead is a convenient free parking area that can accommodate approximately 10–20 cars, making it a great option for self-driving hikers.
If the lot is full, you’ll also find space along the roadside nearby. When we arrived on a Sunday around 8 AM, there were still several open spots, perhaps because many hikers prefer to go on Saturdays.

When we arrived, we noticed someone had pitched a simple tent in the parking area. We guessed they had driven in late the night before and camped there to begin their hike early in the morning. Sure enough, about an hour into our hike, we encountered someone already on their way back down. They told us they had started at 4 AM to reach the summit for the sunrise, we couldn’t help but admire their dedication!
Important Notices at the Trailhead

Right at the entrance, a large warning sign reminds hikers that from October 22 to mid-May, the trail between Yakedake Hut and Kamikochi is closed due to winter conditions. This section can become dangerously snow-covered, increasing the risk of accidents.
Although there was no snow yet during our early November visit, we respected the notice and chose not to proceed past the official closure point. Reaching the summit alone was rewarding enough, we had no need to take unnecessary risks.
Let’s start our Mt.Yakedake hiking !

Not long after starting the hike, we passed a moss-covered, overturned car nestled within the forest. It looked like it had been there for decades, so deeply integrated into the surroundings that it almost felt natural. Its presence made us wonder: had there been an accident here long ago? This unexpected relic gave the trail a mysterious edge and made us pause for a closer look.

Along the path
tiny ice columns had formed as frost pushed its way up from the soil. They looked like glimmering whiskers, delicate and charming. Since I usually hike during spring and summer, this was my first time seeing this phenomenon, and it added a delightful touch of nature’s magic to our autumn hike.

Clusters of tiny white mushrooms were growing on rotting logs. While mushrooms are a common sight in the forest, I always feel a special sense of joy when I spot them. It’s a humble but powerful reminder of nature’s resilience, life continues to thrive, even in the most unlikely places.

A large fallen tree lay across the hiking trail, hinting that this route isn’t as heavily maintained as some others. Several wooden steps along the trail were also showing signs of aging. These little challenges gave the hike a slight sense of adventure, but be sure to watch your step to avoid slipping or misstepping.

After hiking through dense forest
the trail opened up to a grove of conifers, and beyond that, a barren rocky hill came into view. The contrast in landscape was striking. It was almost surreal to realize that in just a short while, we’d be standing on that very summit.

As we climbed higher, the surrounding scenery became a bit repetitive, but every time we turned around, we were rewarded with sweeping mountain views behind us. The late autumn landscape was still dotted with vibrant pockets of red foliage, turning each glance back into a visual treat and a small reward for the climb.

We passed a short tree, already stripped of its leaves, with vivid red berries still clinging to its branches. It stood out brightly against the rocky terrain. A quick note of caution: these wild berries might look tempting, but many of them are toxic, best to admire them visually and avoid touching or consuming them. Respecting nature means keeping ourselves and the environment safe.
Trail Markers: Rock Cairns and Painted Symbols


Scattered stone piles (cairns) marked the way, offering subtle guidance to hikers. I added one of my own stones to a small cairn, hoping that when someone else comes this way, they’ll recognize it as a signal, and maybe even think of me, Tsubaki, who once passed through here.

As we climbed higher, the terrain became increasingly rocky, and the gray, repeating landscape could easily become disorienting. Thankfully, bright painted circles on boulders acted as navigation markers, like trail signs etched into the mountain. These markings were a welcome reassurance, helping us stay on the right path even in the rocky “maze.”
Volcanic Gas at the Summit of Yakedake

As we neared the summit, the scene I had long dreamed of finally came into view, and it was even more breathtaking than I imagined. Towering rock formations loomed like silent sentinels at the peak. It was the very image that had captivated me when I first saw a climber’s photo years ago, the mystical plume of volcanic gas, drawing me in with magnetic force. This was the vision that had motivated me the most on this journey.

What struck me most was the volcanic gas rising continuously from cracks in the rocks, as though the earth itself was breathing. Each wisp of smoke pulsed with life, carrying a raw, mysterious energy that made me stop and hold my breath. Feeling the heartbeat of nature up close is something you can only truly understand when you’ve stood there yourself.

A bit farther away sat the volcanic crater, appearing deceptively calm. Yet you could still hear the wind howling and the occasional sound of falling rocks, a reminder of nature’s quiet power and unpredictability, even from a distance.
Shōga-ike Pond (Shōga-ike)

Nestled quietly among the rocks was a tiny hidden pond, like a secret mirror of the summit. With the air temperature dropping, the surface had formed a thin layer of ice, reflecting the blue sky and surrounding snow like a piece of natural glass. Though we hadn’t yet reached the summit, we were so mesmerized by the view that we paused here for quite some time.
Yakedake North Peak


After nearly three hours of steady climbing, we finally reached the summit. A wooden elevation marker at 2,393 meters stood as a simple yet powerful testament to our effort. Behind us stretched the famous Hotaka mountain range, its ridgeline disappearing into the horizon. We stayed at the summit for about 30 minutes, savoring our packed food and soaking in the incredible reward of the climb, this unforgettable view.

At the peak stood a pile of rocks, likely built by climbers to commemorate their journey. Each stone felt like it held a story, a personal triumph. As I stood there looking at them, I imagined the countless footsteps and dreams that had reached this place before mine, and I couldn’t help but feel a deep pride in myself, too.

I’ve seen some people climb onto the rock pile to take dramatic summit photos, but I didn’t quite have the courage to risk a fall. Instead, I simply walked over and observed it up close, content with the moment.

On the way back down, the rising temperatures had melted the frosty ground into slippery mud, making the trail soft and squishy. While it wasn’t a major challenge, I do recommend wearing waterproof, non-slip hiking boots for easier footing, especially in colder months.
Suggested Packing List for Yakedake
Here’s my personal checklist to help you prepare for your Yakedake adventure:
・Photo ID
・One set of spare clothing
・Towel (great for hot springs afterward!)
・Physical or digital trail map
・Trekking pole (at least one is recommended)
・Hiking snacks, energy supplements, and plenty of water
・Tissue or wet wipes
・Portable toilet bag (e.g. gel-type, disposable urine bags)
・Trash bag or ziplock (to carry out waste and avoid smells in your backpack)
・Essential medication (pain relievers, stomach meds, etc.)
・Bug repellent
・Hiking gloves (optional)
・Sun hat or cap (optional)
・Rain gear (optional)
・Knee support (optional)
Wishing you all the best on your Yakedake hiking — may it be a safe, rewarding, and unforgettable journey! 🥰
**********************************
Traveler’s Note:
The insights shared above are based on my personal experiences and subjective perspectives. When planning your trip, please consider current weather conditions and your own travel preferences.
Please note that all English articles on this site are AI-assisted translations of the original Traditional Chinese content. While every effort is made to ensure accuracy and natural flow, occasional nuances or expressions may differ. Thank you for your understanding.
In an era dominated by viral trends and “clickbait” locations, my true passion lies in exploring hidden corners and regions where information is scarce. I know firsthand how precious detailed, reliable information is when planning a journey. That is why I dedicate countless hours to research and field exploration, to curate these hard-earned insights for fellow travelers like you.
Every article and image on this site represents a significant investment of time and heart. If this content has helped you, the best way to support me is by sharing or reposting this link. I kindly ask that you respect original creators; unauthorized copying or re-uploading is strictly prohibited (all content is protected under DMCA).
Catch my latest travel moments on Instagram: @287.travel
Fuel my next journey: If my guide made your trip smoother, feel free to [Buy Me a Coffee]. Your support keeps this project moving forward!
Thank you for being a part of this community.

**********************************


This is such an incredibly detailed guide on how to hike Mount Yakedake! There is no detail spared, and for someone who would be doing this for the first time, I can’t describe how reassured this makes me feel. From the transportation, to what to expect on the hike, to what to pack, this is an impressive post that has thought of everything.
Thanks so much for spending your time sharing this info!